
DIY Window Valance
10:13 AM
Sewing can be a daunting task and the thought of making your own curtains when you can go out and buy something pre-made is overwhelming. So why make your own??
Curtains really make a room come together. They add a touch of warmth and softness that finishes the space. Custom made curtains allows you to chooses the perfect fabric to go with your design. There are so many options! By making them yourself, you can have something that looks professional and amazing for a fraction of the cost. Discount fabric warehouses are a fantastic resource for finding great fabrics at even better prices. Curtains are just about the easiest things you can sew - just a few simple seams and you're done.
With something this easy, there's no reason not to make your own!

For this valance, I decided to do an interior mount curtain. The window is 46 inches wide, and I decided that I wanted the valance to hang 10 inches down from the top of the window.
 I cut the fabric to be 1 1/2 times the width of the window - 69 inches - plus about an inch on either side for seam allowances, for a total of 71 inches. This is just under 2 yards, so I went ahead and bought 2 yards of fabric, just to be sure.
For the length, I measured out 10 inches, then added 1 inch for the bottom seam allowance and 5 inches for the top rod pocket hem, for a total of about 16 inches.
 Step 1 - Iron all of your fabric. For straight cuts, you want straight fabric.
 Step 2 - Because of the pattern on this fabric, I marked out my hems based on the pattern of the fabric as well as measurements. (*Note* - when making curtains, I would suggest choosing a pattern that is woven in, rather than a printed one. When the curtains are hanging, you want the pattern to hang straight and with printed patterns you run the risk of it being printed crooked.)

Step 3 - Starting with the bottom hem, measure and press (iron) the hems. I found an easy way to do this. Take a stiff piece of card-stock and measure how big you want your hem to be (a 1/2 inch is good), then draw a line across the paper. Use the line as a marker to fold the fabric down to and iron it in place.

Step 4 - I prefer to do a double-fold hem - I find it looks more professional and keeps the edges neater (no little fraying ends). So, after you fold the fabric over the card-stock and iron one fold into it, do it a second time and pin it in place.

Step 5 - Sew a straight seam down the middle of the folded hem.
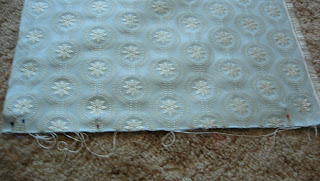
Now move on to the sides. Repeat steps 3, 4, and 5, folding down, pressing, and sewing the hems. When you fold the fabric over the second time, cut a little corner off of the first fold. This will be folded in and sewn over, but it keeps the hem from getting too thick. (See the pictures below.)


Step 6 - I decided to make this valance look rather traditional, with a curtain-rod pocket and a ruffle on top. The basic idea is the same as the other hems that you did around the other sides of the valance, just on a larger scale. First, I folded down the top about 5 inches.

Step 7 - Next I opened up the first fold and folded the top down two inches. Fold back over on the first fold and pin into place.

Step 8 - Sew down the middle - you should have about 2.5 inches on either side. This will make two pockets. (**Note - make sure your curtain rod fits in the lower of the two pockets before sewing! A narrow, flat curtain rod looks best with this kind of valance.**)


Step 9 - Feed the curtain rod into the lower pocket, allowing the fabric to gather on the rod. Install in the window and make sure the gathers are even.


Curtains really make a room come together. They add a touch of warmth and softness that finishes the space. Custom made curtains allows you to chooses the perfect fabric to go with your design. There are so many options! By making them yourself, you can have something that looks professional and amazing for a fraction of the cost. Discount fabric warehouses are a fantastic resource for finding great fabrics at even better prices. Curtains are just about the easiest things you can sew - just a few simple seams and you're done.
With something this easy, there's no reason not to make your own!

For this valance, I decided to do an interior mount curtain. The window is 46 inches wide, and I decided that I wanted the valance to hang 10 inches down from the top of the window.
 I cut the fabric to be 1 1/2 times the width of the window - 69 inches - plus about an inch on either side for seam allowances, for a total of 71 inches. This is just under 2 yards, so I went ahead and bought 2 yards of fabric, just to be sure.
For the length, I measured out 10 inches, then added 1 inch for the bottom seam allowance and 5 inches for the top rod pocket hem, for a total of about 16 inches.


Step 3 - Starting with the bottom hem, measure and press (iron) the hems. I found an easy way to do this. Take a stiff piece of card-stock and measure how big you want your hem to be (a 1/2 inch is good), then draw a line across the paper. Use the line as a marker to fold the fabric down to and iron it in place.

Step 4 - I prefer to do a double-fold hem - I find it looks more professional and keeps the edges neater (no little fraying ends). So, after you fold the fabric over the card-stock and iron one fold into it, do it a second time and pin it in place.

Step 5 - Sew a straight seam down the middle of the folded hem.
Now move on to the sides. Repeat steps 3, 4, and 5, folding down, pressing, and sewing the hems. When you fold the fabric over the second time, cut a little corner off of the first fold. This will be folded in and sewn over, but it keeps the hem from getting too thick. (See the pictures below.)


Step 6 - I decided to make this valance look rather traditional, with a curtain-rod pocket and a ruffle on top. The basic idea is the same as the other hems that you did around the other sides of the valance, just on a larger scale. First, I folded down the top about 5 inches.

Step 7 - Next I opened up the first fold and folded the top down two inches. Fold back over on the first fold and pin into place.

Step 8 - Sew down the middle - you should have about 2.5 inches on either side. This will make two pockets. (**Note - make sure your curtain rod fits in the lower of the two pockets before sewing! A narrow, flat curtain rod looks best with this kind of valance.**)


Step 9 - Feed the curtain rod into the lower pocket, allowing the fabric to gather on the rod. Install in the window and make sure the gathers are even.


![Facebook_F[1]](http://farm8.staticflickr.com/7175/6426658719_cd31bb8b47_s.jpg)


0 comments