
Our New Farmhouse Table (and matching bench)
5:00 AMEver since my family moved to Montana, after my freshman year in high school, I've kind of had a thing for the simple country life. I became obsessed with country music (that actually started before we moved), I had crushes on boys that wore Wrangler jeans, and I was convinced that I would grow up and marry a rancher.

Since then, my lofty goals of running a ranch, going on cattle drives (with my dreamy rancher husband), and gaining the upper hand after a run-in with the outlaws (OK, so I may have read a little too much Louis L'Amour) have subsided a little. Instead, I married a sexy attorney, but I still have my mini-farm goals... a handful of chickens, a miniature Jersey cow, maybe some goats, and of course, an amazing garden (have to learn to grow things first!).
One thing I haven't been able to get out of my system, is the farmhouse design aesthetic. There's just something about the clean lines and no-fuss decor that I love. It's so calming and peaceful, and in the chaos that is currently my life, I need every bit of calm I can manage!

I've had dreams of building my own dining table for years now, and watching Chip and Joanna Gains install beautiful custom-made farmhouse tables over and over, well, it just got to me. Back in California, we have a friend that just happens to be a master carpenter. When I learned that we would be moving, I decided to bite the bullet and have my hubby work with him and build me my dream table. Let's just say that it was absolutely worth it! Doug was so patient to not only help make this dream a reality, but to guide and teach us through the whole process.
I started doing some research, on Pinterest of course, for table styles that I absolutely loved. The Pottery Barn Benchwright table has always been a favorite.

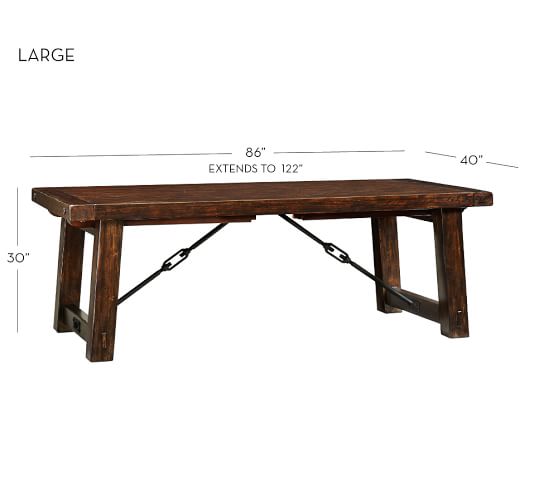
I love the rustic, semi-industrial look of this table, but I wanted to build the table. I wanted that special history behind it. (Maybe I should name it?)
I finally settled on some plans by Ana White to give me a jumping off point for the table. The size didn't work for my space, so that was the first thing to change. I also wanted something a little more substantial looking on top. (Like the table top on the Benchwright table)

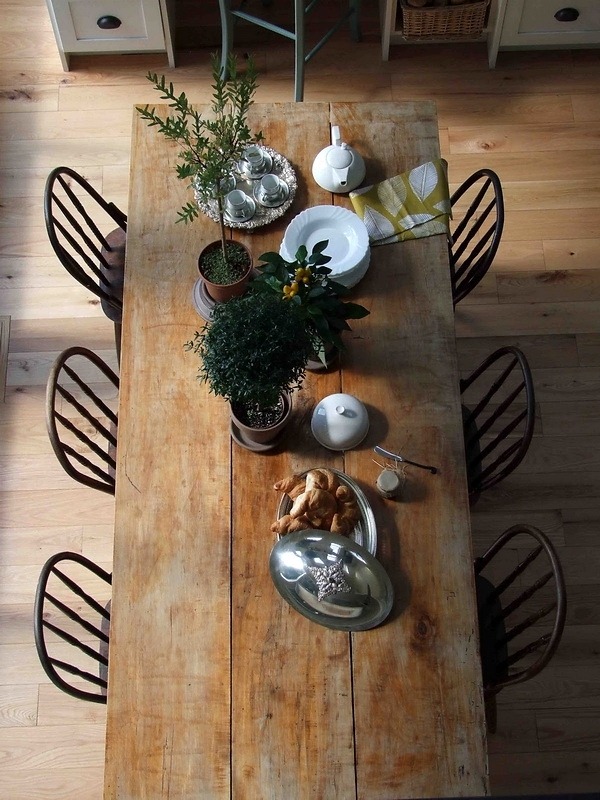
I altered the dimensions on the ends, to allow more space to sit and push a chair under on each end, and got rid of the breadboard ends entirely. I've had this table pinned pretty much forever. I love how wide the planks are, and the rustic look of the raw ends (instead of capping them with a breadboard).
We decided to use rough cut cedar for the table. Partly because it was available in the dimensions I needed within my 1 week time frame (Did I mention we decided to build the table 2 weeks before we moved?!), and partly because it's beautiful. Also, buying rough cut lumber is cheaper than buying it already milled, and we had access to a planer.
We chose 4x4s for the base of the table, which is solid and sturdy, without being overbearing. For the table top, I wanted the widest planks possible, and I wanted them to be thick. The widest piece of wood I could get, without custom ordering it, was 12 inches, so we got four 4x12 inch planks, at seven feet long. Let me tell you - Those are some serious pieces of wood!

As for joining the table together, we notched the beams, recessing them into each other. Not only does it look awesome, but it makes for a sturdier table! Then we glued and bolted everything together using malleable washers. These were the perfect touch, giving it a slightly more industrial feel.


For the table top, we ran 4- 5/8" threaded rods through the table and tightened the whole thing together with more malleable washers and bolts. Then we used 4 long wood screws to go up through the top piece of the legs and into the table top. This thing isn't going anywhere. The table top alone weights over 200 lbs! And even on large felt sliders, I can barely move it.
 |
| Dry fitting the table |
 |
| Put together and starting the hand scraping/finishing work |
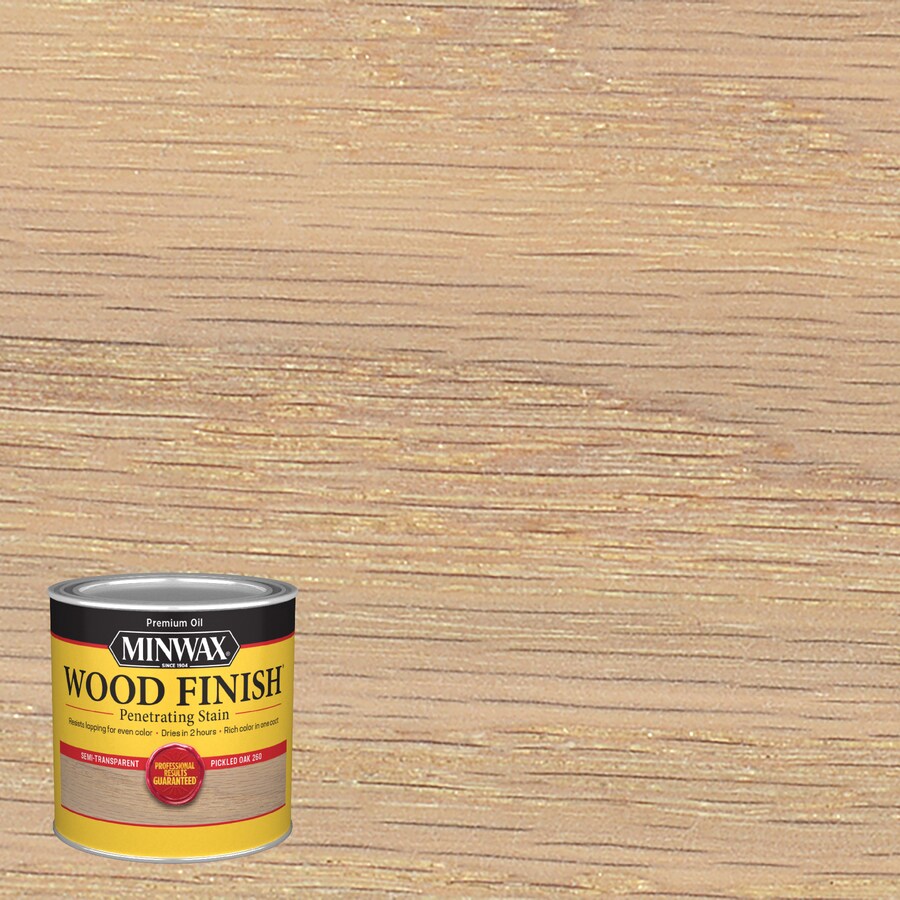
After talking to an incredibly helpful guy at the paint counter of my local hardware store, I tried a super fast application of the Minwax "Pickled Oak" stain. I basically wiped it on and then wiped it right back off. It brought out the grain a little more, but otherwise, the wood looked exactly the same! The difference came when I added a coat of water-based poly - it went on clear and beautiful, and didn't darken the wood at all! Four coats later, we - and 4 men from my husband's office - finally moved the table into the house.


This table is an heirloom that will not leave our family for generations, mostly because nobody will be able to move it, but also because we absolutely love how it turned out! If you are inspired to go out and make your own table, the first thing I would suggest is to become good friends with a master carpenter. Our dear friend Doug made this table possible, and really went above and beyond what we asked of him to make this come to pass. His skill and pride in his work is incredible! And it shows every time we sit at our beautiful new table.


 |
| Sketching designs for the table and Liam wanted to draw what mommy was drawing! |
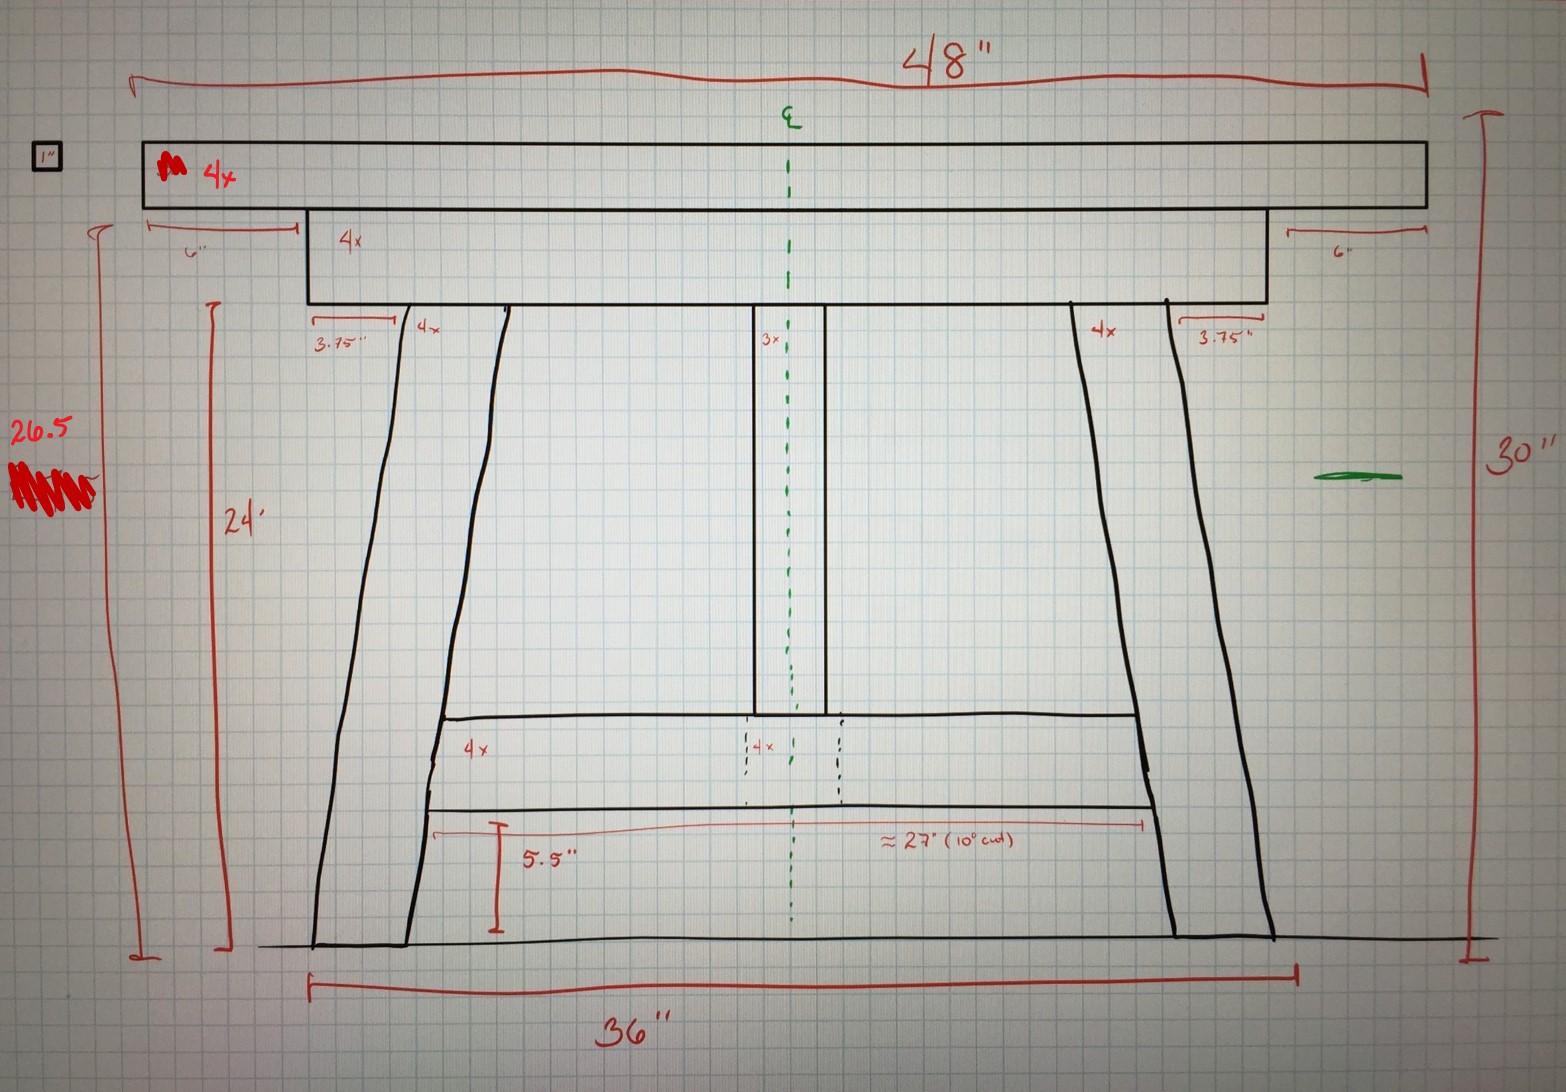 |
| Basic measurements for the base/narrow end of the table |

![Facebook_F[1]](http://farm8.staticflickr.com/7175/6426658719_cd31bb8b47_s.jpg)


0 comments